|
||||||||
|
|
||||||
|
3.
Dump the pulp into a large, deep dishpan, and swirl the pulp around with your hands. You'll probably have to add more water at this point; the mixture should be about 90 percent liquid. (You may have noticed that it takes quite a bit of water to process the paper fiber.) Since you're always mixing the pulp with your hands, warm water helps to keep your hands from getting chilly. If you plan to use your paper as stationery, dissolve a packet of gelatin in hot water, and stir the gelatin into the pulp mixture. The gelatin, which is known as "size", will make the paper less porous. Without the size, ink would bleed. Now lightly blend your soaked colored paper for about ten seconds. Don't overblend - you want the colored paper to appear in your paper as confetti-like accents. Alternatively, you may add other materials or food coloring directly to the pulp, or you can add textures on top of the pulp after forming a sheet. For example, you might want to add some wildflower seeds on top of the paper. Cards made with seeds can later be planted by the recipients to create flower gardens.
4.
Always stir the pulp just before dipping the mold and deckle into it. Hold the mold with the screen facing up. Place the deckle upside down on top of the mold so the smooth sides of the frames face each other.
Don't let the pulp collect too thickly on the screen - thinner paper turns out better! Let the excess water drip off for about two minutes. You can rest the mold and deckle on a corner of the dishpan while the water is draining. If you want to add seeds or other adornments to the top of the paper, now is the time. Set up a drying space where the handmade paper can be left overnight. Place one-half of a disposable kitchen cloth on top of several sheets of newspaper.
Repeat the above process to make as many sheets of paper as you like. Let your paper dry undisturbed overnight. When it's dry, gently peel off the kitchen cloth from each sheet of paper, starting at one corner. If a sheet isn't dry on the reverse side, turn it over and let it finish drying. When all the sheets are completely dry, stack them and place heavy books on top of the stack for a couple of days to press the sheets flat. (To speed up these last steps, you can iron partially dry paper between two kitchen cloths at a medium temperature.) After the sheets have been pressed, they'll be ready for display or to be made into cards or other objects.
|
||||||
|
5.
Paper fibers can clog your drain, so do not throw any leftover pulp into the sink. Instead, recover it! Use the mold to strain the pulp from the water. Cover the drain in the sink with the mold, and pour the remaining pulp over the screen. Remove the pulp from the screen before it's full. Dry the leftover pulp and place it back in your recycling container.
|
||||||

|
|

|
|
|
| © Exploratorium |
 Put
a handful of the soaked white paper into the blender. Add warm water
to fill the blender about three-quarters full. Blend for up to a minute
until the mixture has a consistency something like that of oatmeal.
(If the mixture is not blending well, or if the motor is straining,
add more water, or remove some paper.) Repeat this process four times
to form the batch of basic pulp.
 Grasp
the mold and deckle securely and lower them vertically into the
dishpan.
 Immediately
bring the mold and deckle to a horizontal position under the pulp
and lift them straight up, allowing the pulp to cover the screen.
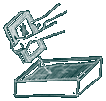
 Lift
off the deckle. Turn the mold over onto the cloth so that the pulp side
is down. With a sponge, soak up the water from the back side of screen.
Gently pat the screen to soak up the water; don't wipe it. Make sure
to sponge well around the edges. Squeeze the water out of the sponge
into a small container or back into the pulp pan. Keep soaking up the
water until you see the paper separating from the screen. Starting at
one corner, gently remove the mold.